Inside: Here are 7 ways to learn about your ancestors using floriography for kids. Floriography is the art of applying meaning to flowers and has been practiced for thousands of years. Try one or all of these 7 fun floriography activities with your kids/grandkids.
Floriography for Kids
Floriography is a delicious word that rolls off the tongue and is associated with the art of applying meanings to flowers. It’s been practiced for thousands of years throughout Europe, Turkey, Asia, Africa, and other cultures and countries. Today, there are fun and interesting ways to practice floriography for kids.
Floriography was introduced to Europe (specifically England) by Mary Wortley Montagu in 1717. In 1727, Aubry de La Mottraye introduced floriography to the Swedish court.
Lady Mary Montagu brought floriography back from Istanbul, Turkey after misinterpreting a game she played there called, Sélam. In the game, women sent secret messages to one another by exchanging objects and flowers. Montagu erroneously interpreted “the coded floral language used by harem women was to communicate with their lovers.”
Floriography became a popular hobby during the reserved Victorian era because people were able to convey their feelings to someone without saying a word. Instead, they gave flowers to others where each bloom was fraught with meaning.
During the 19th century, books were published explaining the meaning and language of flowers—known as “floriographies.”
Even artists, authors, and poets used floriography to communicate hidden artistic messages. Writers Jane Austen and Emily Dickinson used floriography in their novels and poems and Vincent Van Gogh and Dante Rossetti used floriography to bring meaning to their paintings.
My ancestors are predominantly from England, Sweden, Switzerland, France, and Germany. They understood floriography. They raised their daughters—my grandmothers—to love flowers and ponder their meanings. My grandmothers grew sweet-smelling lilac bushes, irises, roses, daffodils and tulips. My paternal grandmother had an amazing viburnum snowball bush that was covered with white flowers each Spring. They both knew and understood the meaning of each bloom.
Here are some activities to celebrate your ancestors and floriography.
#1 Floriography for Kids: A Quick Lesson on the Meaning of Flowers
Here are two simple activities you can do with your kids/grandkids as you learn the meaning of different flowers:
There are dozens of books where you can learn about the meaning of hundreds of flowers (see below). For fun, with your grandkids, create a bouquet of flowers with various meanings and give them to someone you love.
Or make a “tussie-mussie”—a hand-held bouquet where the stems are held together with doilies or flowers to wear around your head. These have been around since medieval times and were fraught with meaning.
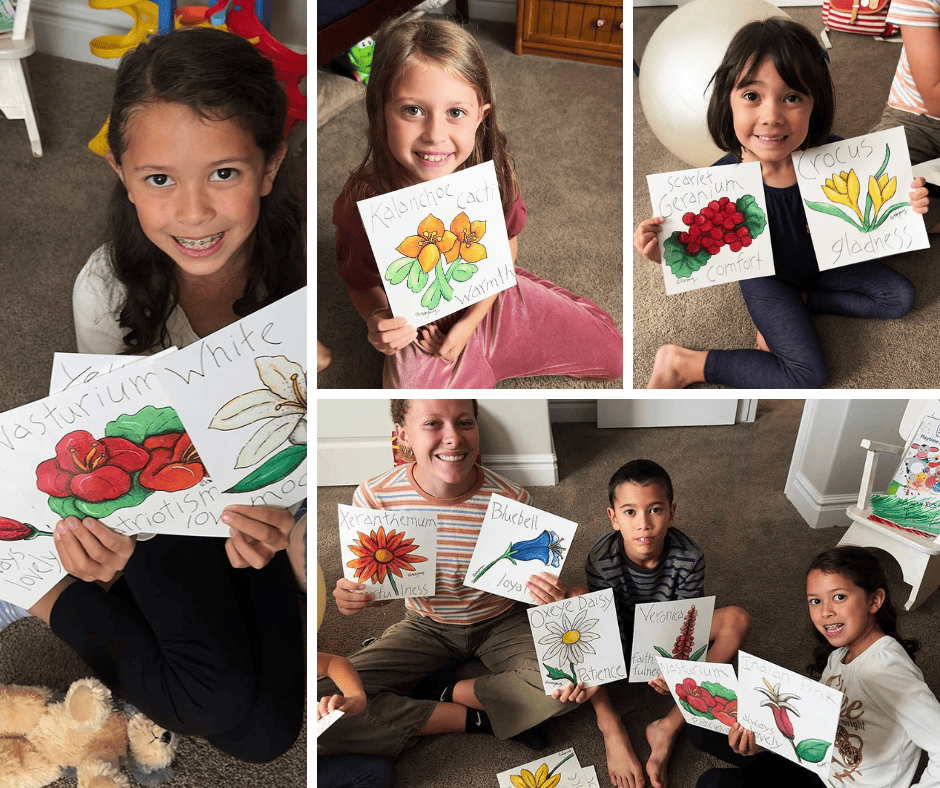
Second, download pictures of flowers and their meanings to teach your kids/grandkids. Years ago, I purchased clipart pictures of floriography and I use them to teach my grandkids about the different meanings of flowers.
Here is the meaning of a few flowers:
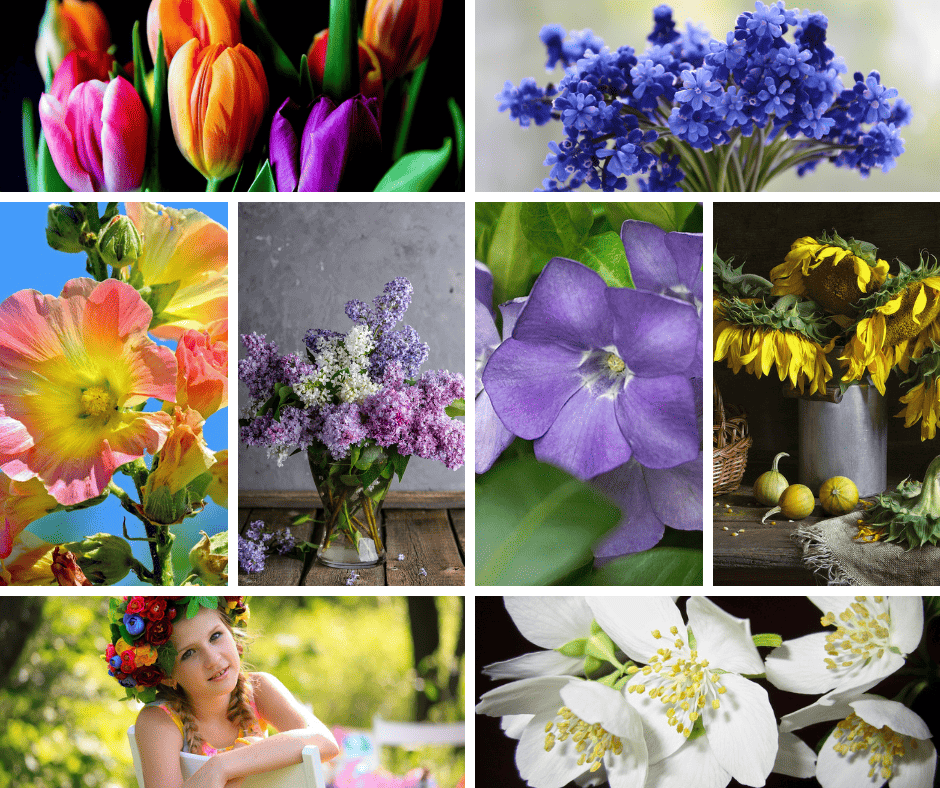
- Tulips: declaration of love
- Sunflower: adoration
- Lilac: humility
- Periwinkle: friendship
- Jasmine: joy
- Forget-me-not: true love
- Hollyhock: ambition
- Bluebell: loyalty
#2 Lessons in Floriography for Kids: Hammering/Pounding Flowers
You’ve probably tried pressing flowers between heavy books. When I was a tween and teen, I did it several times under the tutelage of my grandmothers. And my ancestors—Jane Austen and Emily Dickinson pressed flowers all the time. But I was never very good at it…
The art of pressing flowers started in Japan during the Heian period (794-1185) and was done to preserve the beauty of the changing seasons. It was known as “Oshibana.”
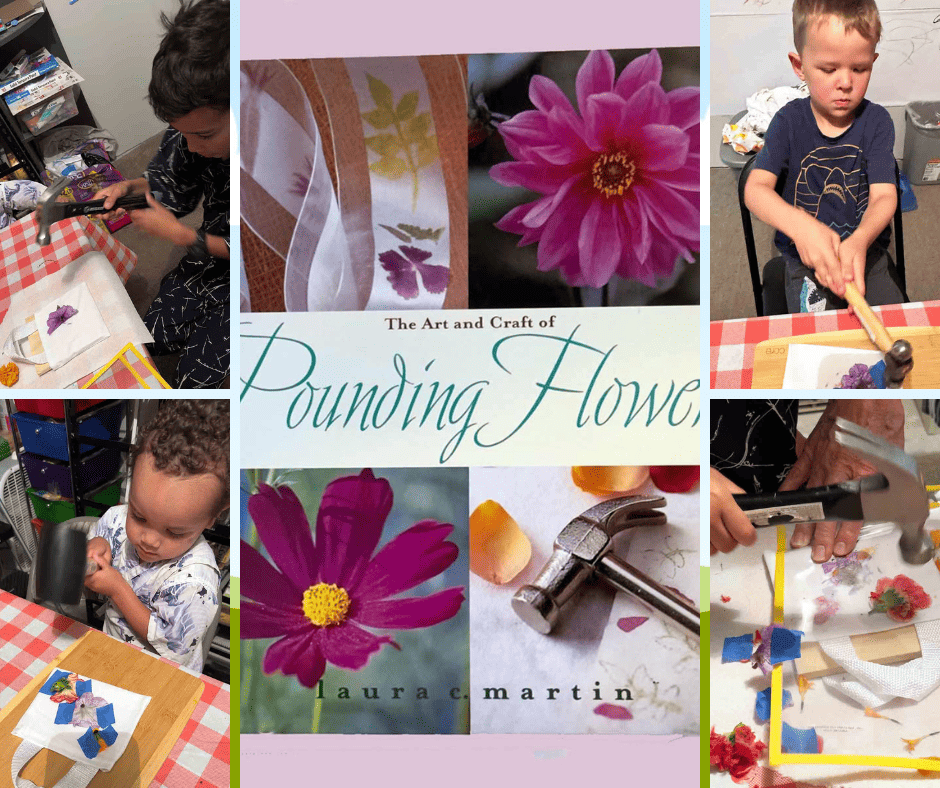
Since pressing flowers takes weeks, try hammering flowers instead! My favorite book for learning about hammering flowers is The Art and Craft of Pounding Flowers by Laura Martin.
Flower pounding or Tatakizome is another ancient Japanese art using paper or fabric and flowers. And the best part—it’s easy enough for the smallest of hands.
It’s best to hammer flowers on watercolor paper which has a texture or on tote bags that have a texture. The pattern of the flowers shows up better. Also, you can take each petal of a flower and hammer them one at a time to create another interesting effect. Supplies are minimal and kids/grandkids LOVE pounding things (great for proprioception)!
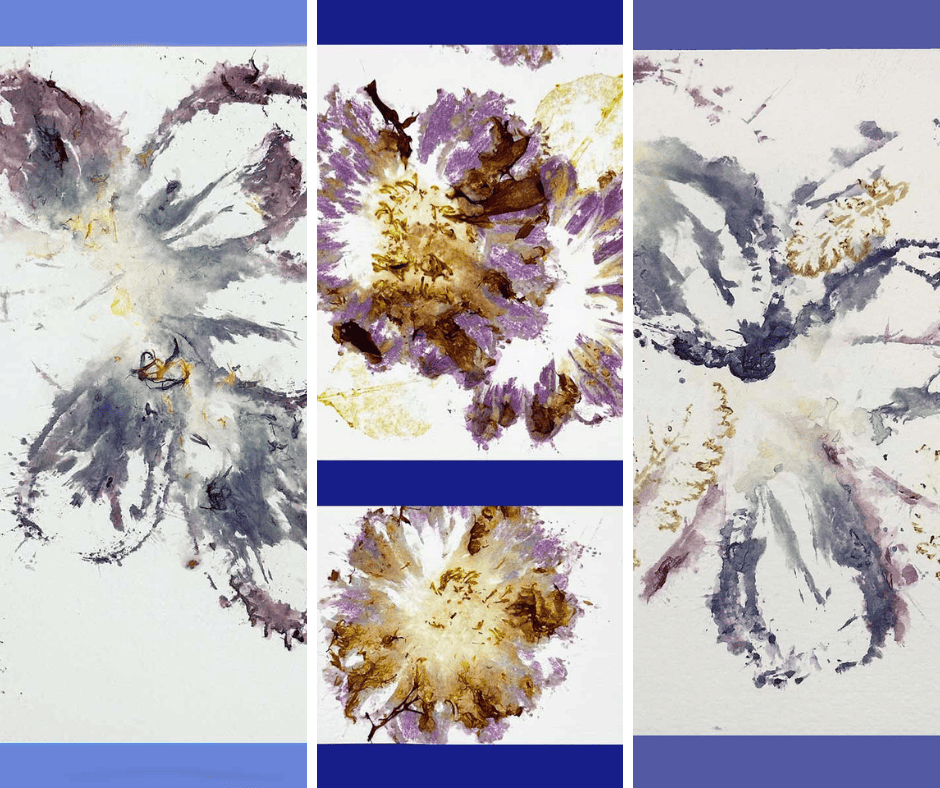
Flowers pounded on watercolor paper–easy to see the amazing textures of the flowers! Some of these were tulips and we pounded one petal at a time.
Supplies
- Miniature white tote bags (Hobby Lobby) or watercolor paper—we used both
- Real flowers of different colors
- Metal or mallet hammers
- Cardboard
- Painters tape
- Hard plastic sheet
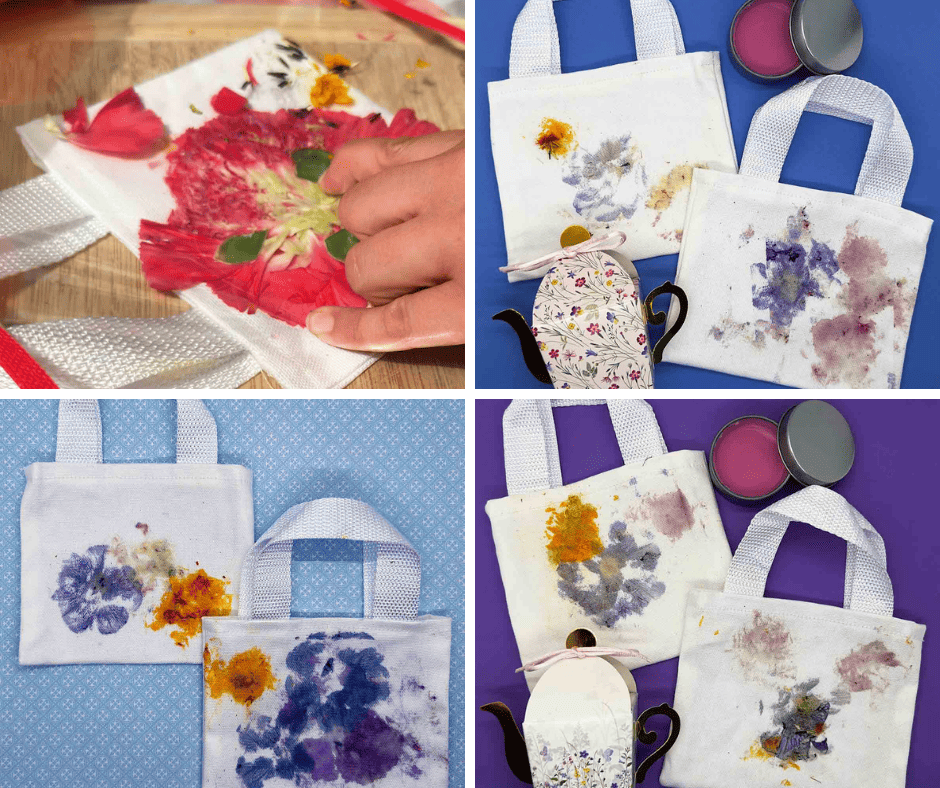
Flowers pounded/hammered on tote bags–the image of the flower is not as clear as it was on the watercolor paper.
Directions
- To create a hard surface, place a piece of cardboard or a small board inside the tote bag. If you are using watercolor paper, place the cardboard underneath the watercolor paper.
- Place the flowers, bloom side against the tote or paper and gently flatten
- Put a piece of hard plastic over the flower(s) or tape the flowers in place
- Hammer the flower onto the tote bag or paper.
- Remove the plastic and gently lift the flower from the tote or paper.
- The hammered flower may be damp—let it dry
- You can also trace over the hammered flowers with a fine black Sharpie pen to make the image of the flower sharper
#3 Printmaking with Flowers and Leaves
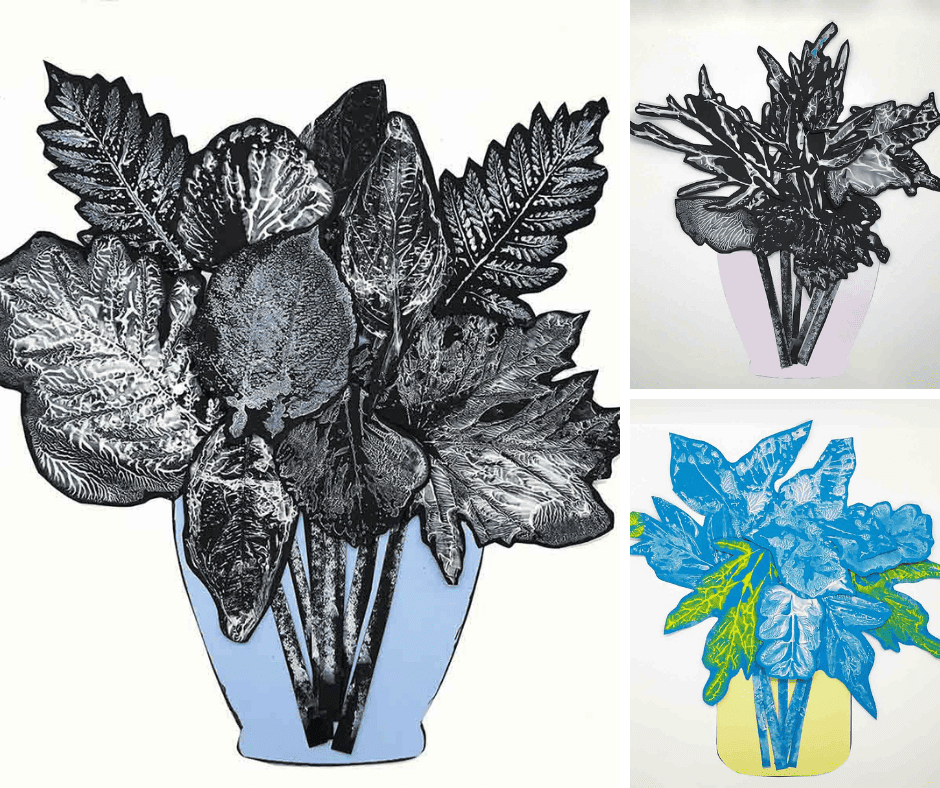
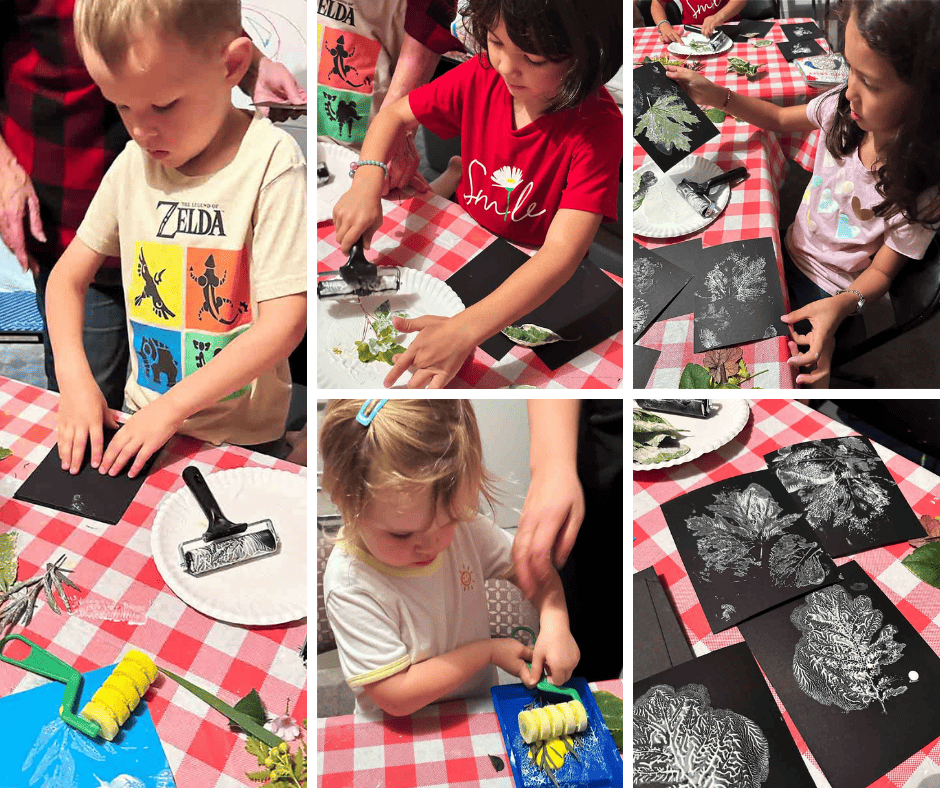
Another way to practice floriography for kids is printmaking using ink, paint, and a rubber brayer. It’s exciting to see the shadow effect and delicate textures of the flowers and leaves when doing this. It was another way our ancestors created immortal blooms!
The history of botanical prints dates back to the 13th to the 19th centuries when botanists, herbalists, and doctors all over the world used herbal hand-drawn prints for medical research and identification. I own a reproduction of one of these botanical hand-drawn print books.
Make this an educational activity and talk about your artistic ancestors who practiced the art of printmaking flowers and leaves or any of your ancestors who hand-drew plants and flowers that were used in books for medical research.
Supplies
- Flowers and plants
- Brayers
- Ink (black) or acrylic paint (white)
- Black and white cardstock paper
Directions
- Gather different flowers/plants in nature. Leave a portion of the stem attached
- Put some paint or ink on a paper plate
- Roll the brayer across the ink/paint but don’t get it too saturated
- Take the flower/plant and roll the ink/paint on both sides
- Place the painted flower/plant on the paper
- Take another piece of cardstock and press down over the flower/plant
- Carefully lift the paper—you will have mirror images on each piece of paper
- Take all your prints, cut them out and create a vase full of plant/flower prints
#4 Squeegee Painting Flowers and Plants
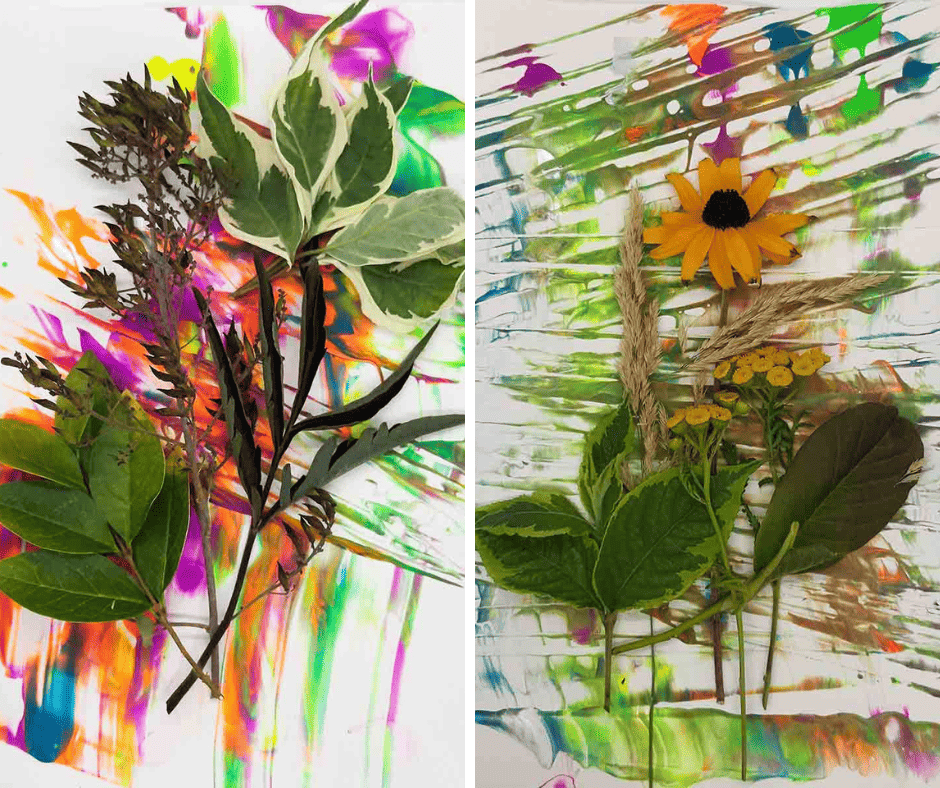
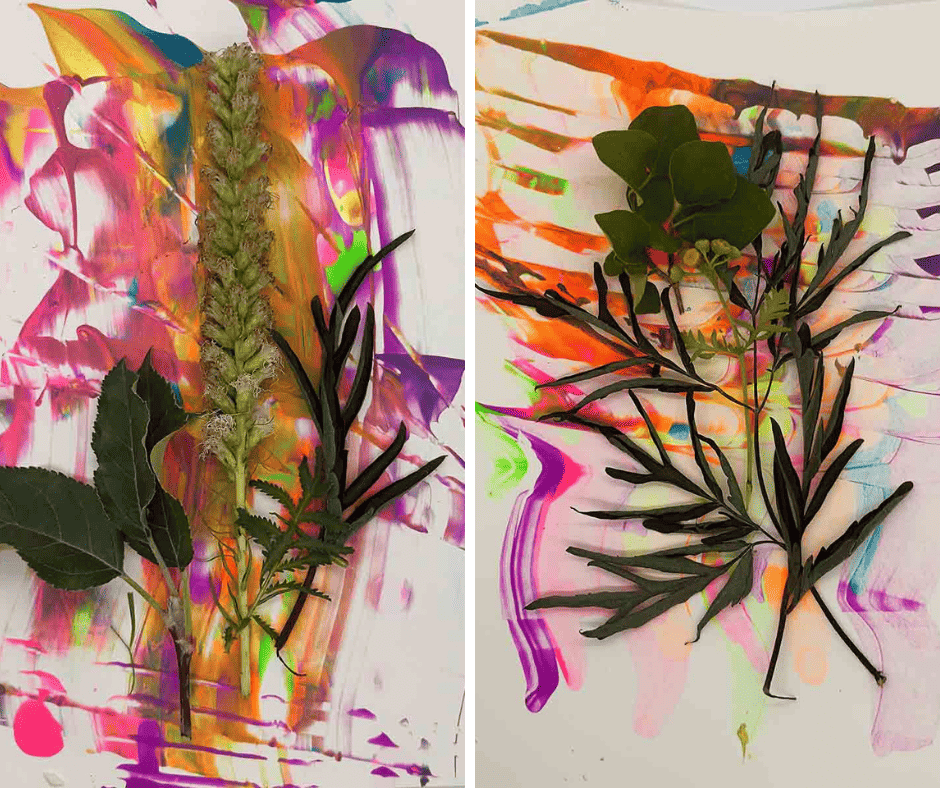
If you have very young kids/grandkids who have difficulty doing the activity above, try creating these colorful blooms using squeegees to create a burst of color background for your plants or blooms. Then go out in nature and find flowers and plants to decorate your paper. Supplies are easy to find and the end result is beautiful!
Supplies
- White cardstock paper
- Different colors of tempera or acrylic paint
- Squeegee or scraper
- Plants and flowers found in nature
- Glue
Directions
- On a piece of cardstock, squirt a few dots of paint around the page
- Using a squeegee, scrape the paint across the page and down creating a rainbow effect.
- When the paint is dry—glue your flowers or plants on the paper.
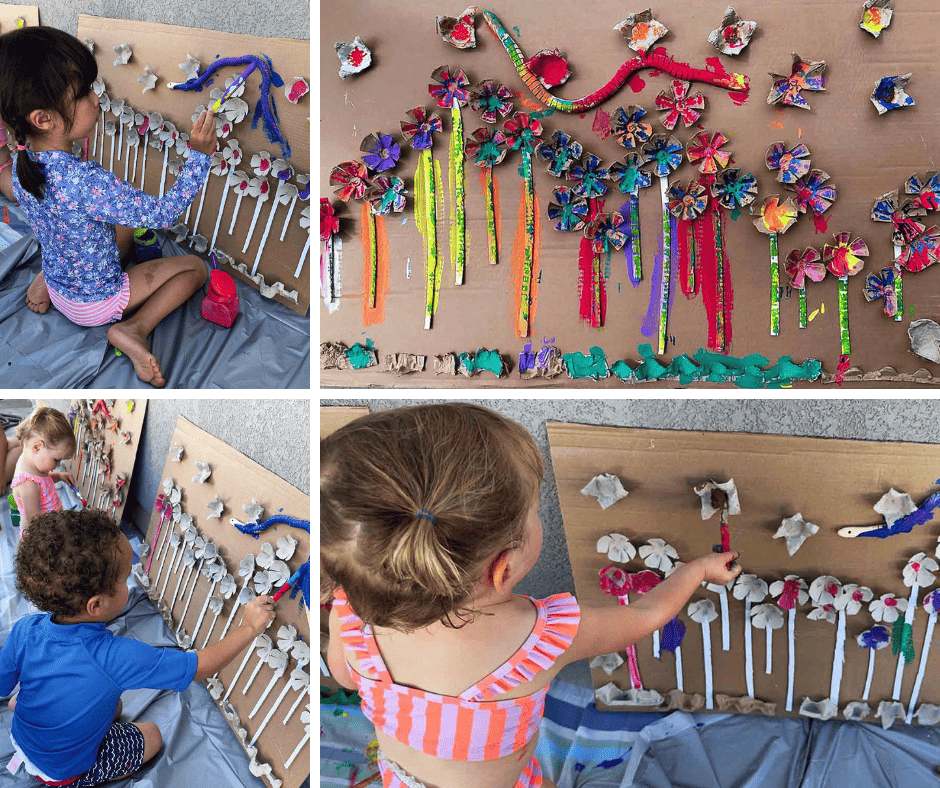
#5 Creating a Cardboard Flower Garden
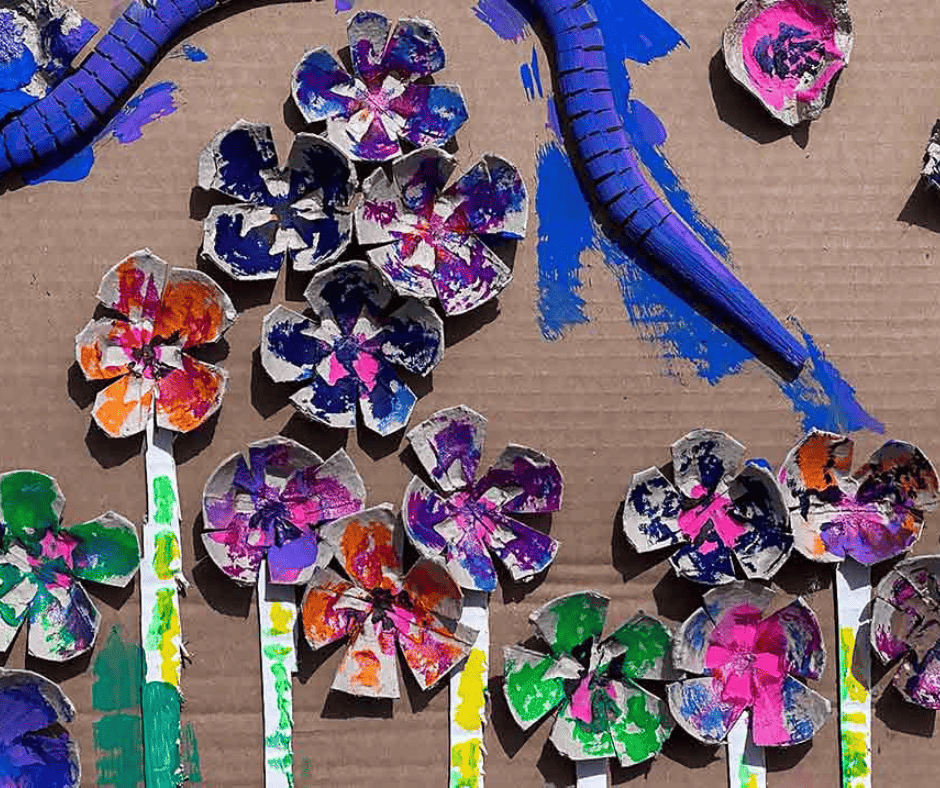
At your next family gathering, talk about floriography and create a flower garden out of cardboard and cardboard egg cartons. Paint your blooms and talk about ancestors who loved to plant flowers. In our family that included my grandmothers, great-grandmothers, and great-great-grandmothers. All the way back to the 1700s!
Celebrate your ancestors who loved and grew flowers with a cardboard flower garden!
Supplies
- Cardboard—long piece
- Egg cartons—cardboard
- Tempera paints
- Kwik Stix Markers
- Hot Glue
- Wooden snakes (optional)
Directions
- Cut a piece of cardboard about
- Create a bunch of flowers using cardboard egg cartons
- Make stems for the flowers from more cardboard
- Arrange everything on your long piece of cardboard and hot glue in place
- Use Kwik Stix markers to color your flowers.
- Make a sun out of cardboard and glue some wooden snakes on the cardboard. It will look like a real garden!
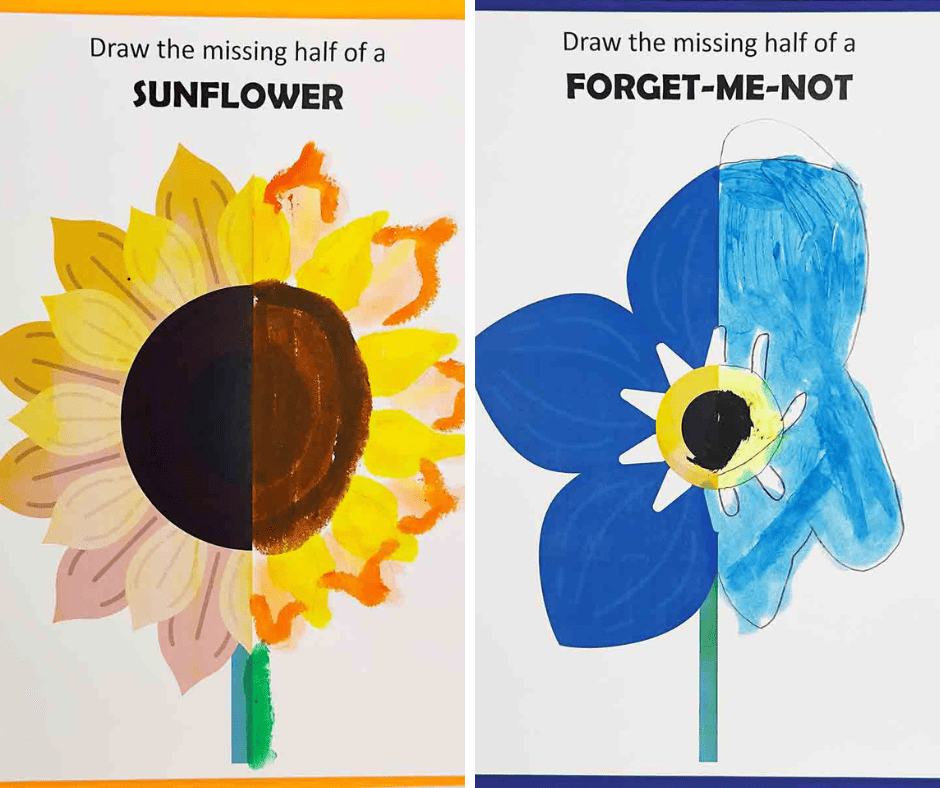
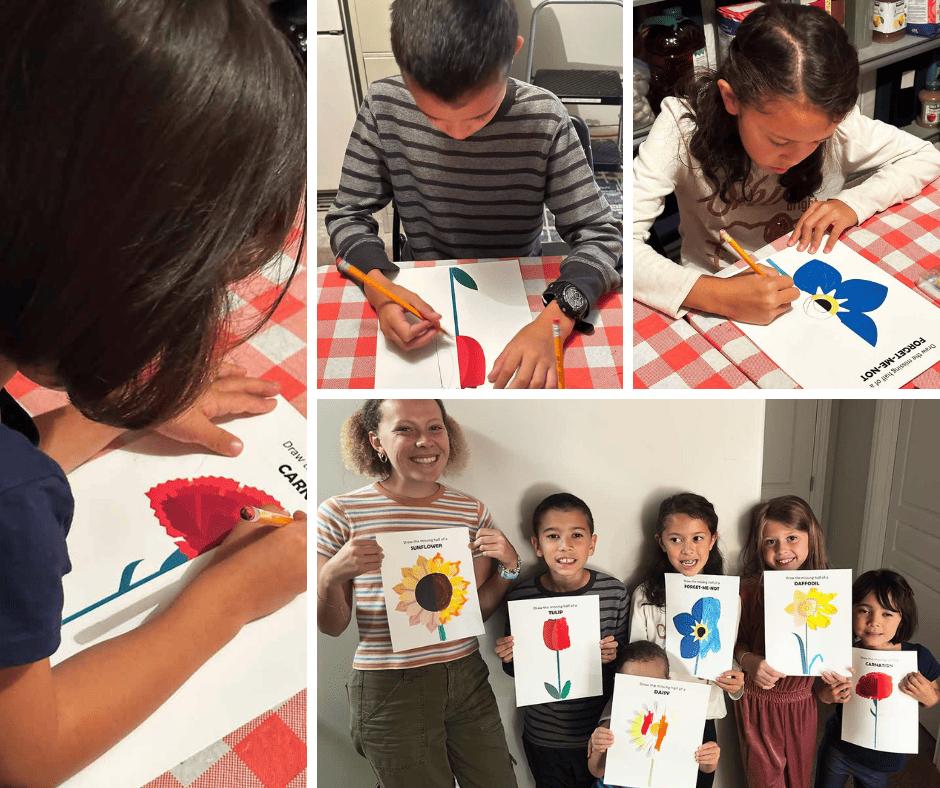
#6 Draw the Missing Half of a Flower
I saw this online and thought it would be fun for our grandkids to do when we talk about floriography and our ancestors.
Plus, it’s a great way to develop spatial intelligence in children. Spatial intelligence is connected to higher-order thinking skills, and understanding math and science better. To draw the missing half of a flower requires a child to observe lines, shapes, and spaces carefully so it becomes both a fun and educational activity.
Download the “Draw the Missing Half of a Flower” prompt and give everyone pencils, and markers to color their blooms.
#7 Books & Games About the Art of Floriography
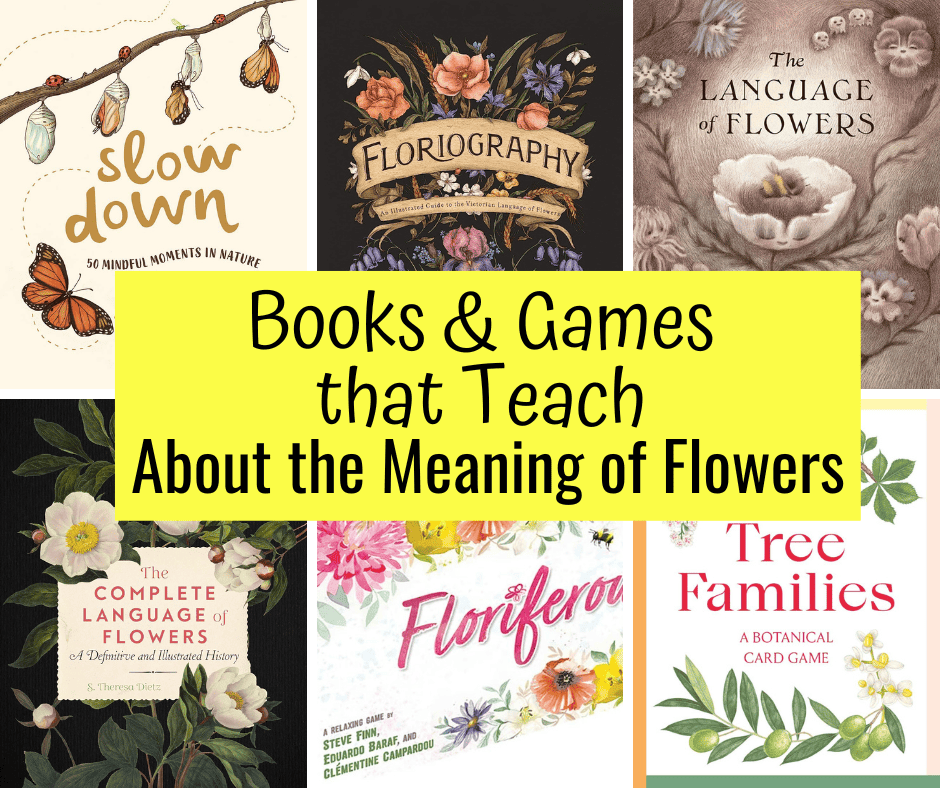
Want to learn more about floriography for kids? Here are some fabulous books and games for your kids/grandkids to help teach them the meaning of flowers.
- The Language of Flowers by Dena Seiferling
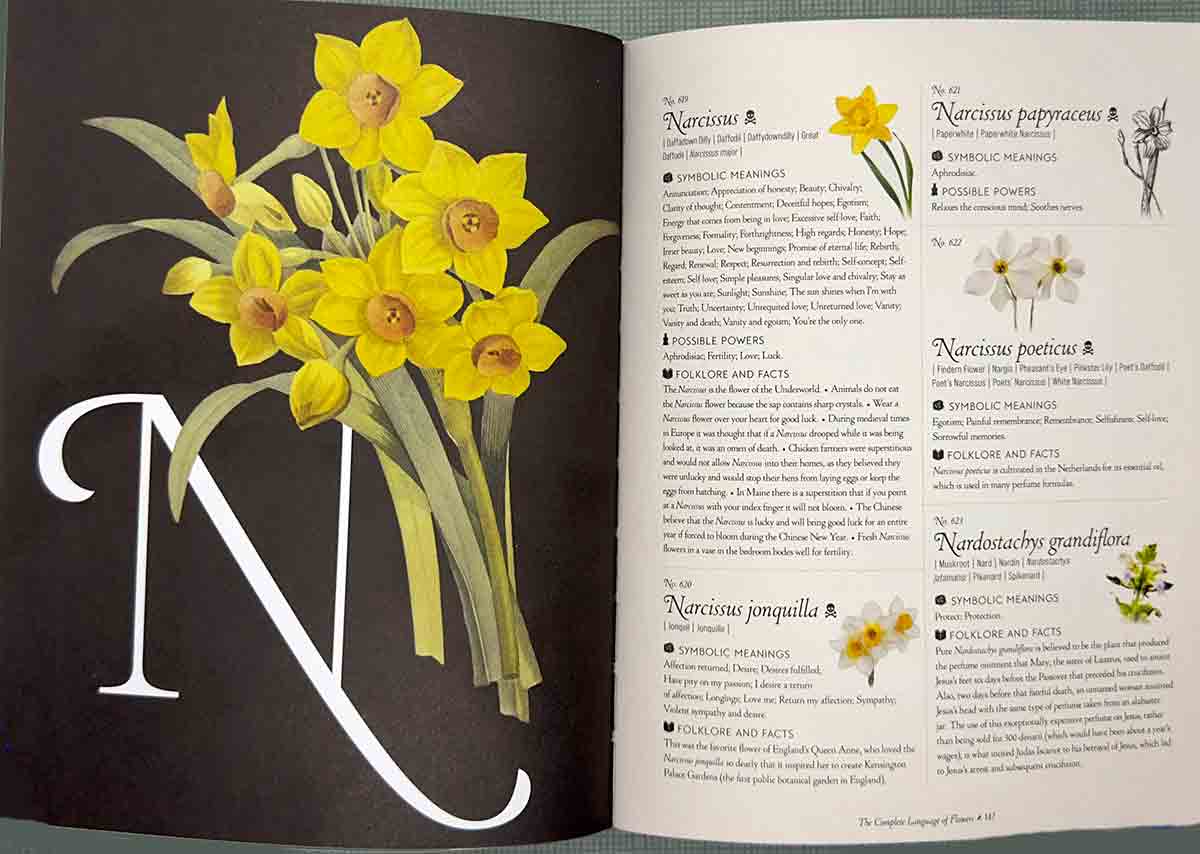
- The Complete Language of Flowers by S. Theresa Dietz
- Floriography: An Illustrated Guide to the Victorian Language of Flowers by Jessica Roux
- Slow Down: 50 Mindful Moments in Nature by Rachel Williams
- Floriferous Card Games
- Game: Laurence King Tree Families: A Botanical Card Game
Check out my other blog post which is filled with lots of fun flower activities to do with your kids/grandkids to celebrate the art of floriography: Here are 7 Amazing Ways of Making Paper Flowers with Kids


Leave a Reply