Inside: Here are 7 of the most fun snowflake activities for grandkids, kids, and families. Arts and crafts, books, kitchen activities, science, and lots more to teach kids about the fascinating world of snowflakes.
Snowflake Activities
I’m a grandma to 14 beautiful grandchildren. I’m also a retired college instructor.
For someone who loves teaching, it’s hard to be “a teacher without a classroom.” So, I’ve created a modified classroom for my 5 nearby grandkids (ages 2, 8, 9, and two 4-year-olds). I share with them things that will increase their sense of wonder and curiosity—art, literature, music, science, and a healthy dose of movement and games.
For our activities, I get inspiration from nature, art museums, fabrics, quilts, children’s books, people online whose work I admire, and from past experiences.
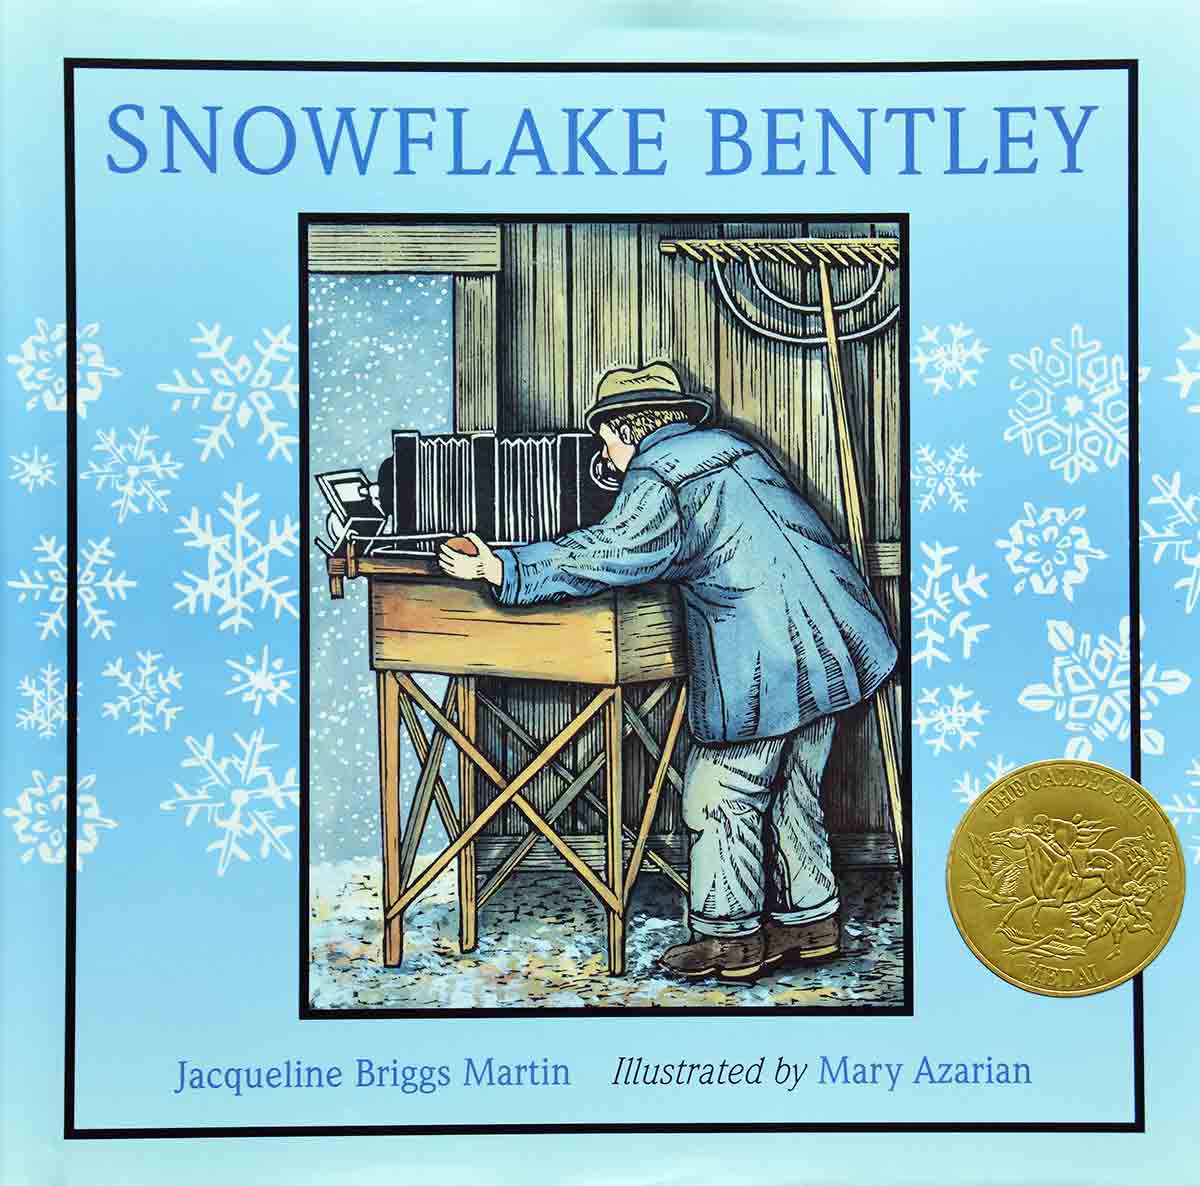
It’s winter so we’re knee-deep in snowflake activities and learning all we can about these fascinating ice crystals. The inspiration for snowflake activities came from a children’s book I purchased in 1998 about the true story of a man who lived in the 1800s and loved snowflakes. He was the first person to photograph these ice crystals. His name—Wilson Bentley or lovingly called by the people in his Vermont town—Snowflake Bentley.
Here are a few things he discovered about snowflakes:
- They are actually tiny ice crystals that grow to form a snowflake
- Most snowflakes have 6-sides however, some have 3
- No two snowflakes are alike (although some scientists today believe otherwise)
- Snowflakes fall at a speed of 3-4 miles per hour
- Snowflakes are not all white
Try one or all of these 7 snowflake activities with your grandkids/kids to celebrate and learn more about these tiny ice crystals:
NOTE: I don’t always include specific music activities, but I always play classical music in the background as we do our activities. Try playing Handel’s Water Music–it will help your grandkids/kids concentrate better.
Snowflake Activities for Grandkids/Kids
#1: Tape Resistant Snowflake Quilt
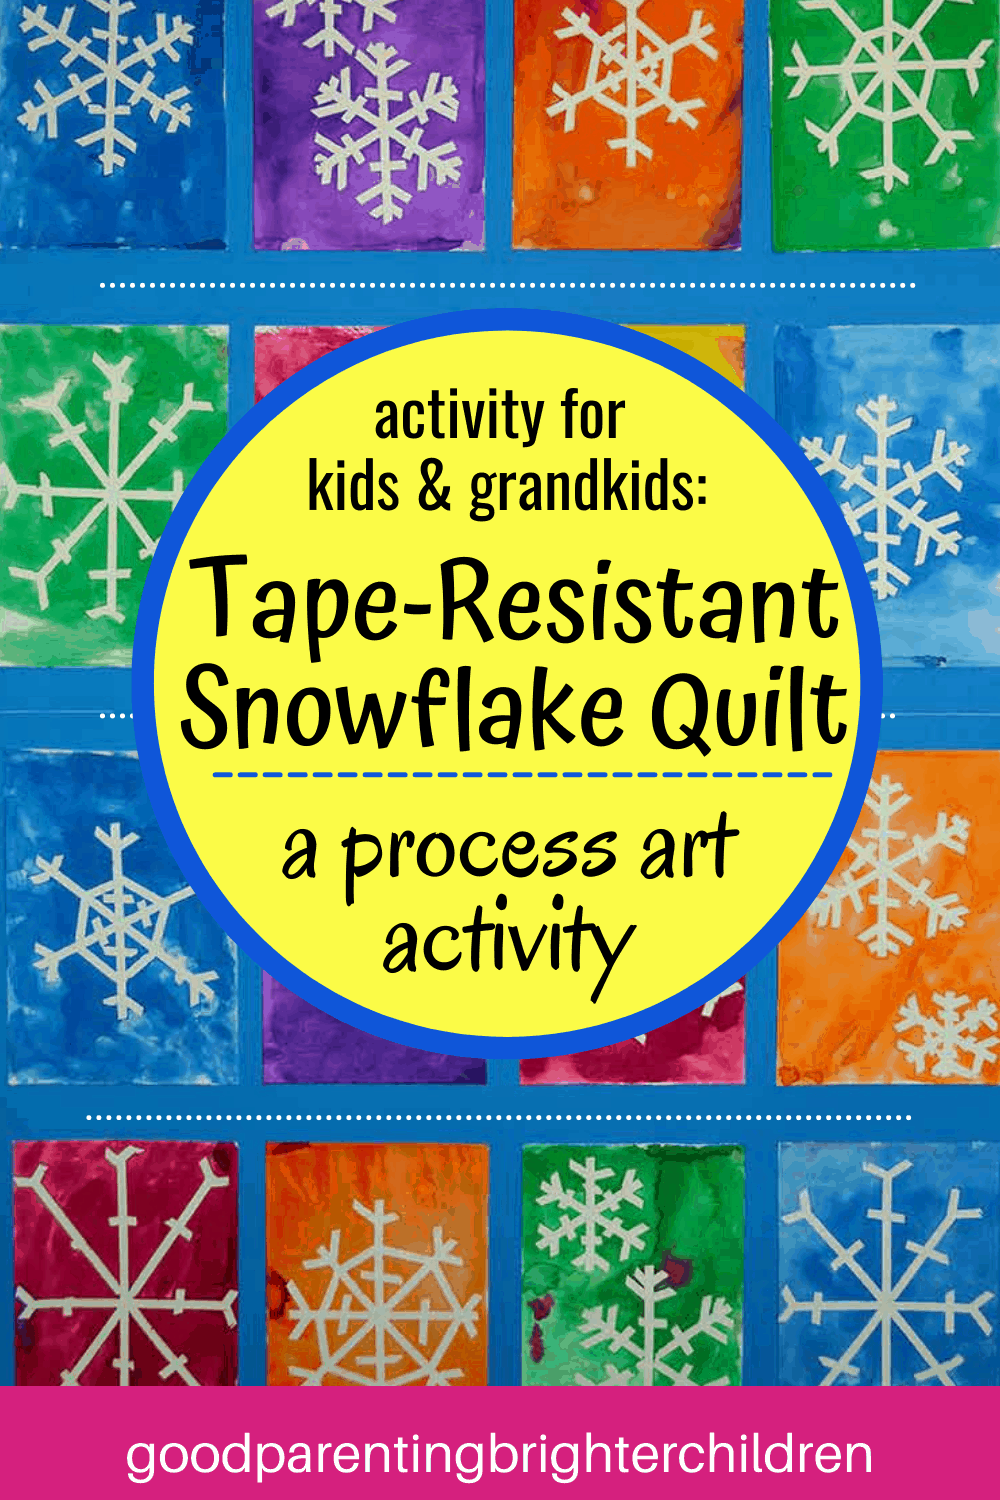
Have you seen tape-resistant activities online? I have—but I haven’t seen them done with snowflakes. So, we made tape-resistant snowflakes that we used to create a colorful paper quilt
It’s considered process art (different steps to completion) and develops patience and problem-solving skills.
We made 16 snowflakes using painter’s tape and watercolor paper (4 for each child). After painting them with watercolors; we removed the tape to reveal a bright snowflake quilt.
My inspiration for creating a snowflake quilt came from my sister-in-law—Dodi Poulsen, a nationally renowned quilter and fabric designer. A few years ago, she gave me a quilt filled with colorful Christmas tree patterns. I decided my grandkids and I could do something similar with snowflakes and paper.
Supplies
- Watercolor paper (9×12”)
- Watercolors
- Painter’s tape ¼” thick
- 2 poster boards—light blue color
Directions
- Cut the watercolor paper in half to make a piece that’s 4.5×6”
- Using ¼” painter’s tape—create different patterns of snowflakes. We created 4 different snowflake designs; one of each design per child for a total of 16 paper snowflakes.
- To make it easy for little hands, draw the snowflake on the paper and have the grandkids/kids put the tape on the design
- Using watercolors, have the grandkids/kids paint each snowflake block (my grandkids love intense colors so I lightly diluted the watercolors)
- Let dry
- Carefully take off the painter’s tape to reveal a white snowflake underneath
- Tape 2 poster boards together to form one big poster board
- With the 16 snowflake blocks, design a quilt on the poster board.
- Hot glue each snowflake square on the paper quilt
- Display on a wall
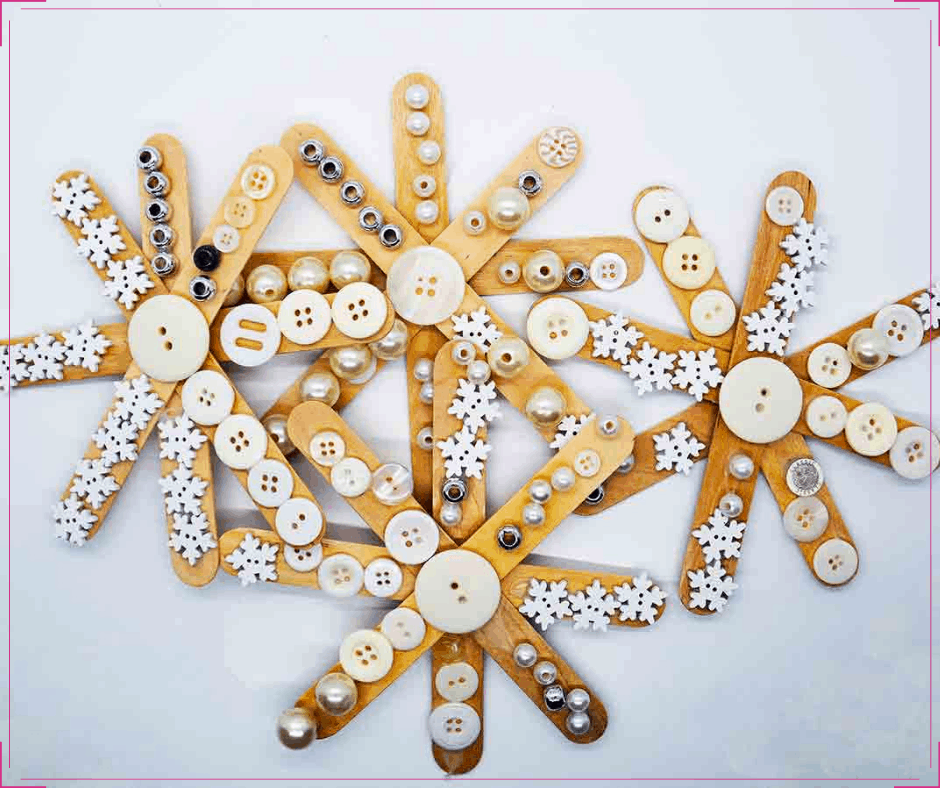
#2: Snowflake Activities: Popsicle Stick Snowflakes
Here are fun and easy ways to make beautiful snowflakes. It requires fine muscle coordination. Inspiration: @sensoryplaymatters
Supplies
- Popsicle sticks—we used the wider ones
- Glue
- White buttons
- Snowflake buttons
- Silver beads, pearls (Dollar Store)
Directions:
- Using 4 popsicle sticks, crisscross the sticks to create a snowflake design. We liked 8-sides instead of 6 sided-snowflakes. Hot glue in place
- Provide lots of different things for your grandkids/kids to glue on their snowflakes—white buttons, snowflake buttons, pearls, silver beads, etc.
- Use regular glue when gluing the beads & buttons on the popsicle sticks
#3: Foam Snowflakes w/Jewels
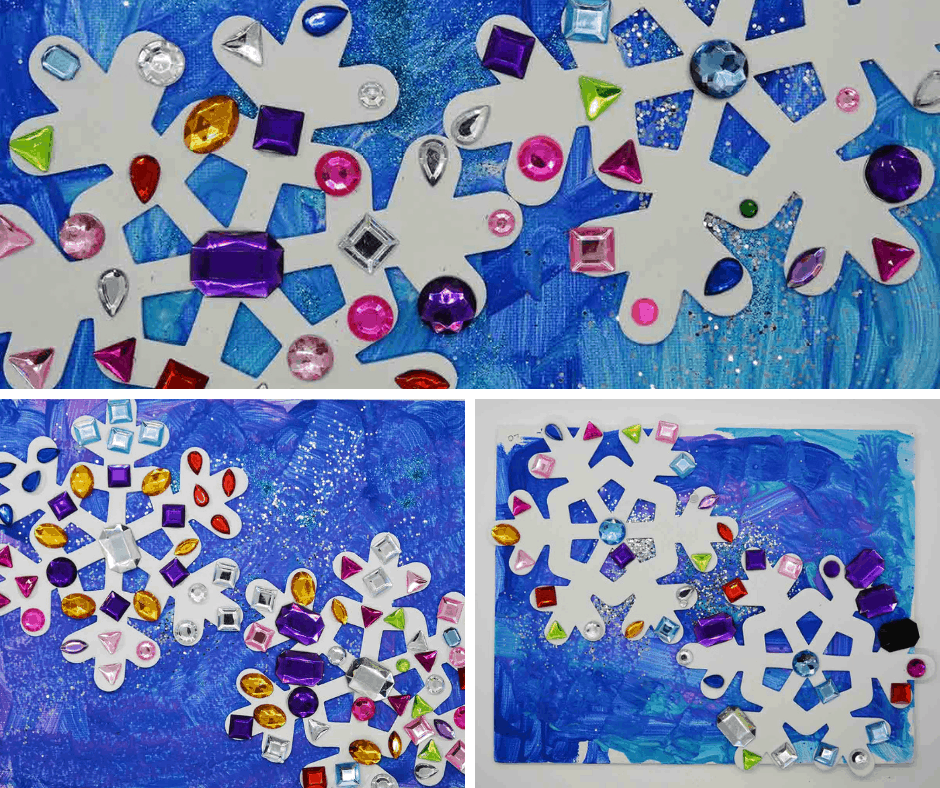
Try this simple jeweled snowflake. First, paint a sparkling sky on canvas to put the snowflakes on. Glue the jewels on the snowflake and adhere to the canvas.
Supplies
- Jewels
- Foam snowflakes 6″
- Canvas: 5×7 or 8×10
- Glue
- Tempera paints—blue, white
- Foam brushes
- Glitter
Directions
- Supply each child with a canvas
- Using foam brushes, paint the canvas with different colors of blue tempera paint mixed with white paint to create different shades of blue
- While the paint is wet, shake silver or white glitter over the sky
- Let dry
- Using a foam snowflake, glue different jewels on the snowflake
- Glue the snowflakes onto the painted canvas
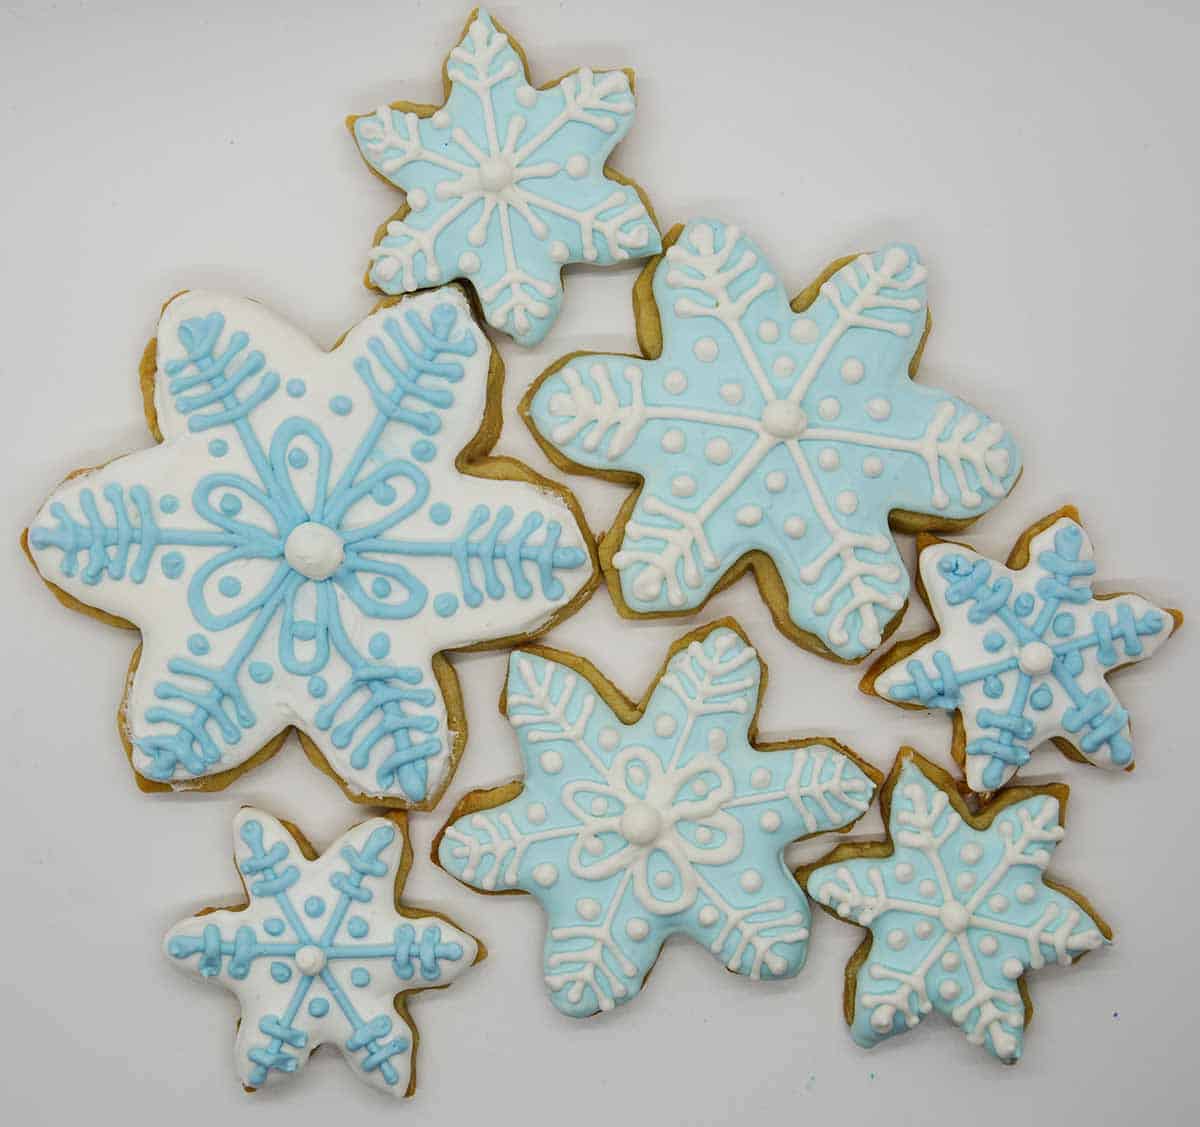
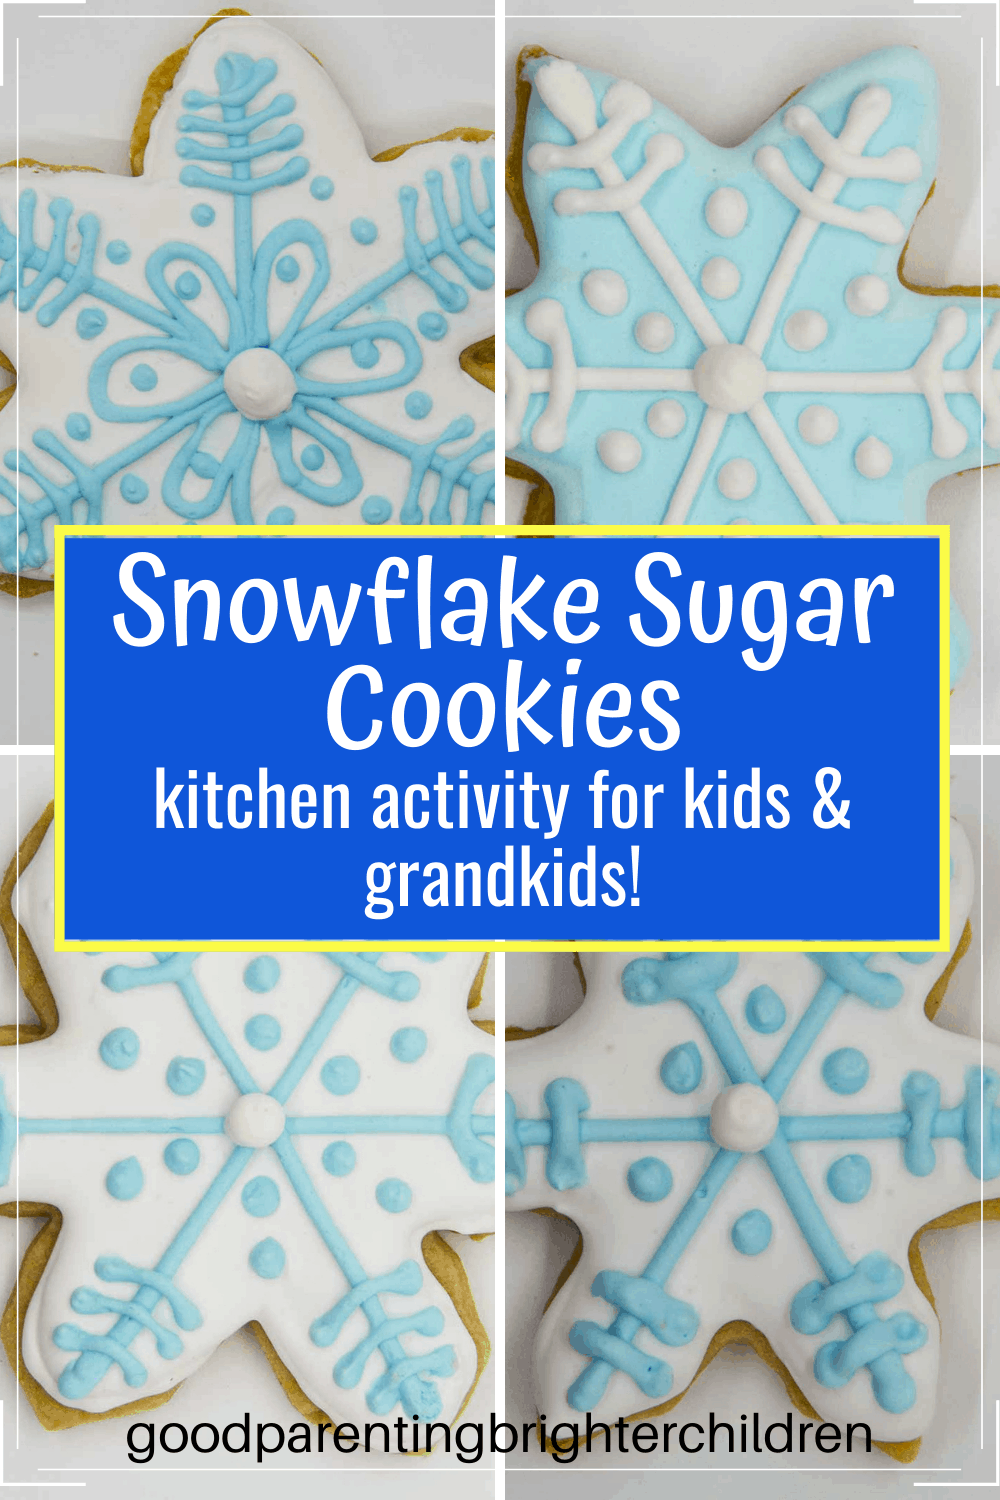
#4: Snowflake Activities: Making Snowflake Cookies
When your grandkids come for a visit, set aside time to spend in the kitchen. So many things are learned—measuring, fractions, mixing, and more.
We made snowflake sugar cookies using snowflake cookie cutters and grandpa helped the kids create the designs.
- ⅔ cup butter
- ¾ cup granulated sugar
- 1 teaspoon vanilla
- 1 teaspoon lemon or orange zest
- 1 egg
- 4 teaspoons milk
- 2 cups flour
- 1 ½ teaspoons baking powder
- ½ teaspoon salt
- Cream butter, sugar, vanilla, and zest.
- Add egg, beat until light and fluffy
- Stir in milk and dry ingredients
- Put the dough in the refrigerator for 1 hour
- On a lightly floured surface, roll dough to ¼ inch thickness
- Use snowflake cookie cutters
- Bake on greased cookie sheet for 8-10 minutes
- Remove from pan. Cool
- Frost with royal icing; use tips #2, #3 to make the design
Supplies
- Recipe for sugar cookies
- Snowflake cookie cutters
- Frosting
- Cake tips #2, #3
Directions
- Make a batch of sugar cookies
- Roll the dough and punch with snowflake cookie cutters
- Bake and cool
- Frost the cookies with royal icing (we made white and light blue frosting)
Help your grandkids/kids use a frosting bag. Their hands will get stronger and more steady as they create more intricate designs on cookies. They will need adult help in the beginning.
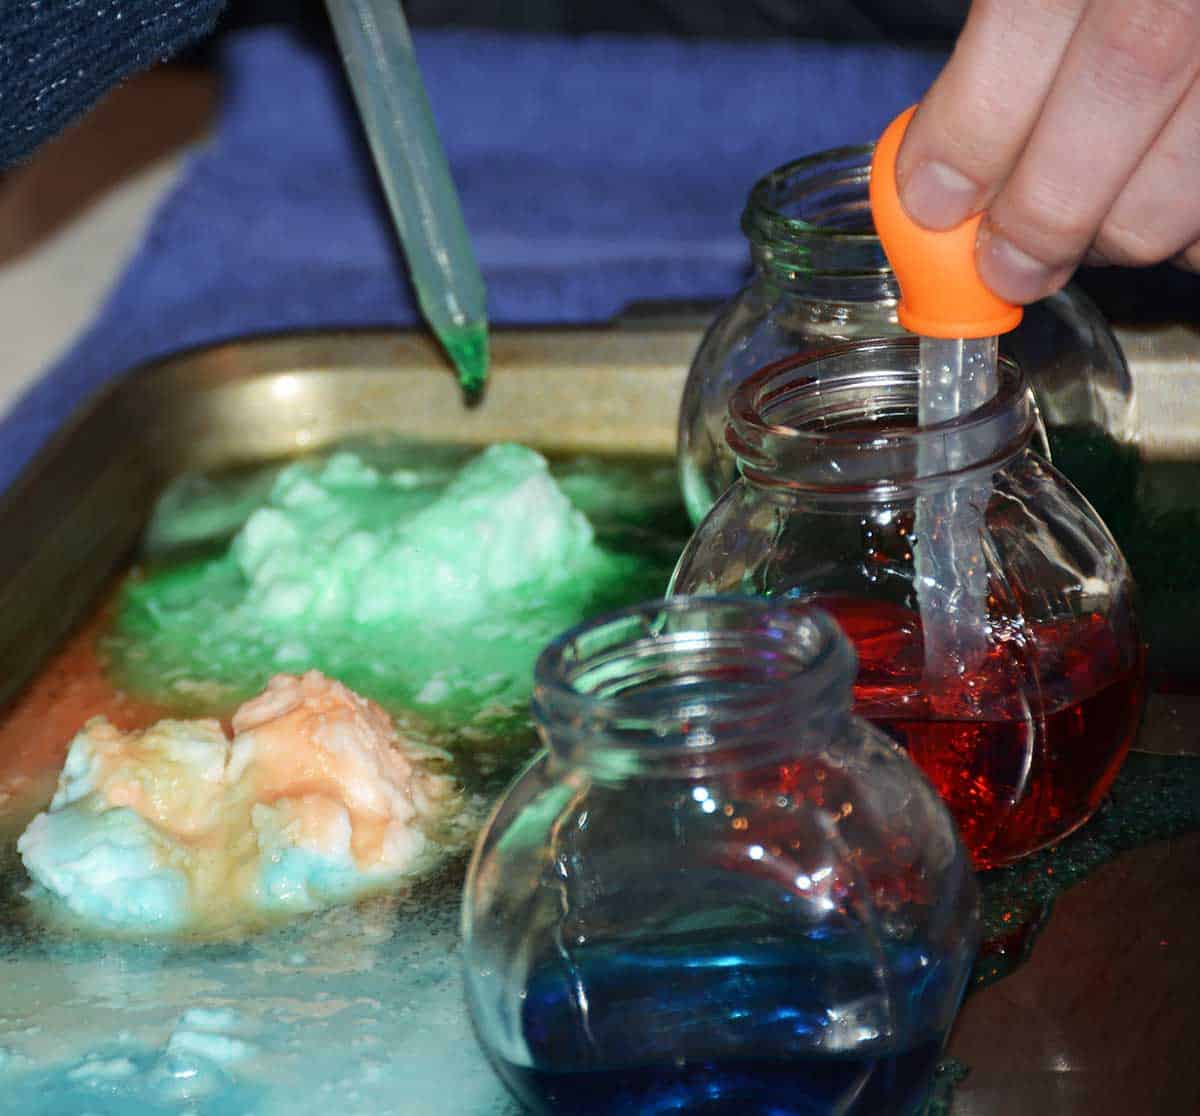
#5: Science Fun: Fizzy Snow
Everyone knows that when you combine baking soda and vinegar you get fizz & foam! Using the same science principle—here’s a fun recipe and activity for making and melting snow. Point out to your grandkids/kids that snowflakes are made from snow and ice—and they melt very quickly!
Supplies
- Baking soda
- Vinegar
- Food coloring
- Water
- Glass jars
- Eyedroppers
Directions:
- Make snow from baking soda using 4 cups of frozen baking soda and 1 cup of very cold water. Mix together to form a ball
- Press the mixture into muffin tins (will make 12)
- Remove from tin and let dry for at least 12 hours.
- Pour vinegar and a few drops of food coloring into each glass jar.
- Using an eyedropper, let each child pour the different colored vinegar mixtures over their snowballs and watch them fizz into wonderful colors.
#6: Shaving Cream Snowflakes & Marbleized Sky
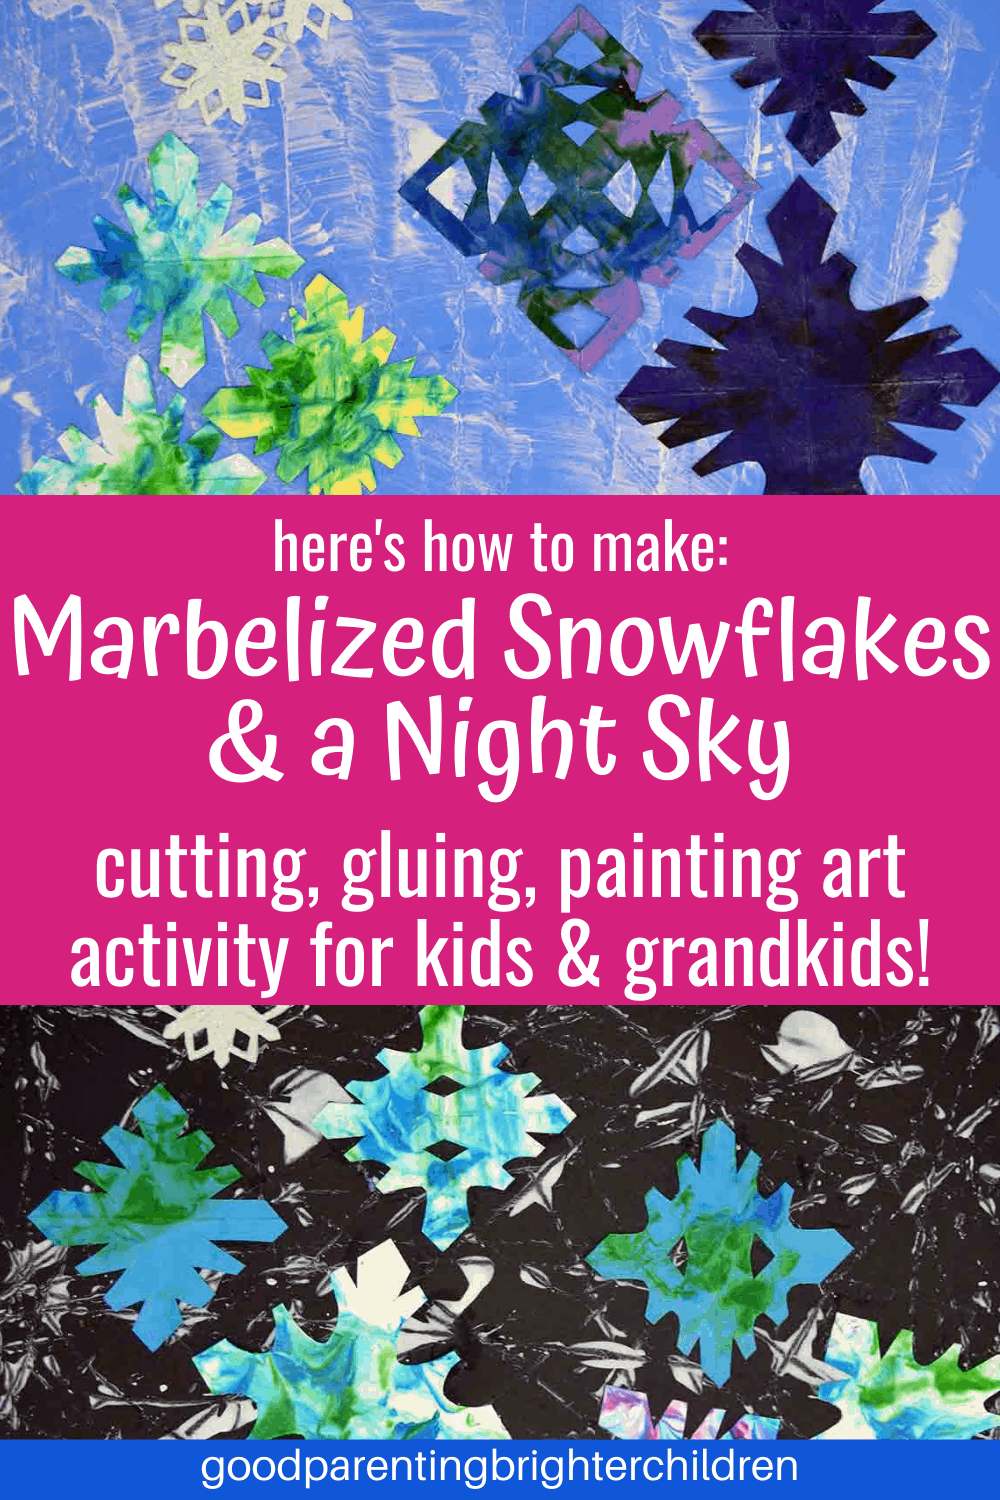
One of our grandkids’ favorite activities is using shaving cream to create marbleized art and rolling marbles over paper for a marbleized effect. So, we combined the two to create marbleized snowflakes and a night sky.
Supplies
- White tempera paint
- Black & blue poster boards
- Marbles (3 per child)
- 9×13 pan
- Masking tape
- Shaving cream
- Paper plates
- Food coloring
- Popsicle sticks
- Snowflakes—different sizes, and colors & made from cardstock paper
- Credit cards (1 per child)
- Glue
Directions for Sky
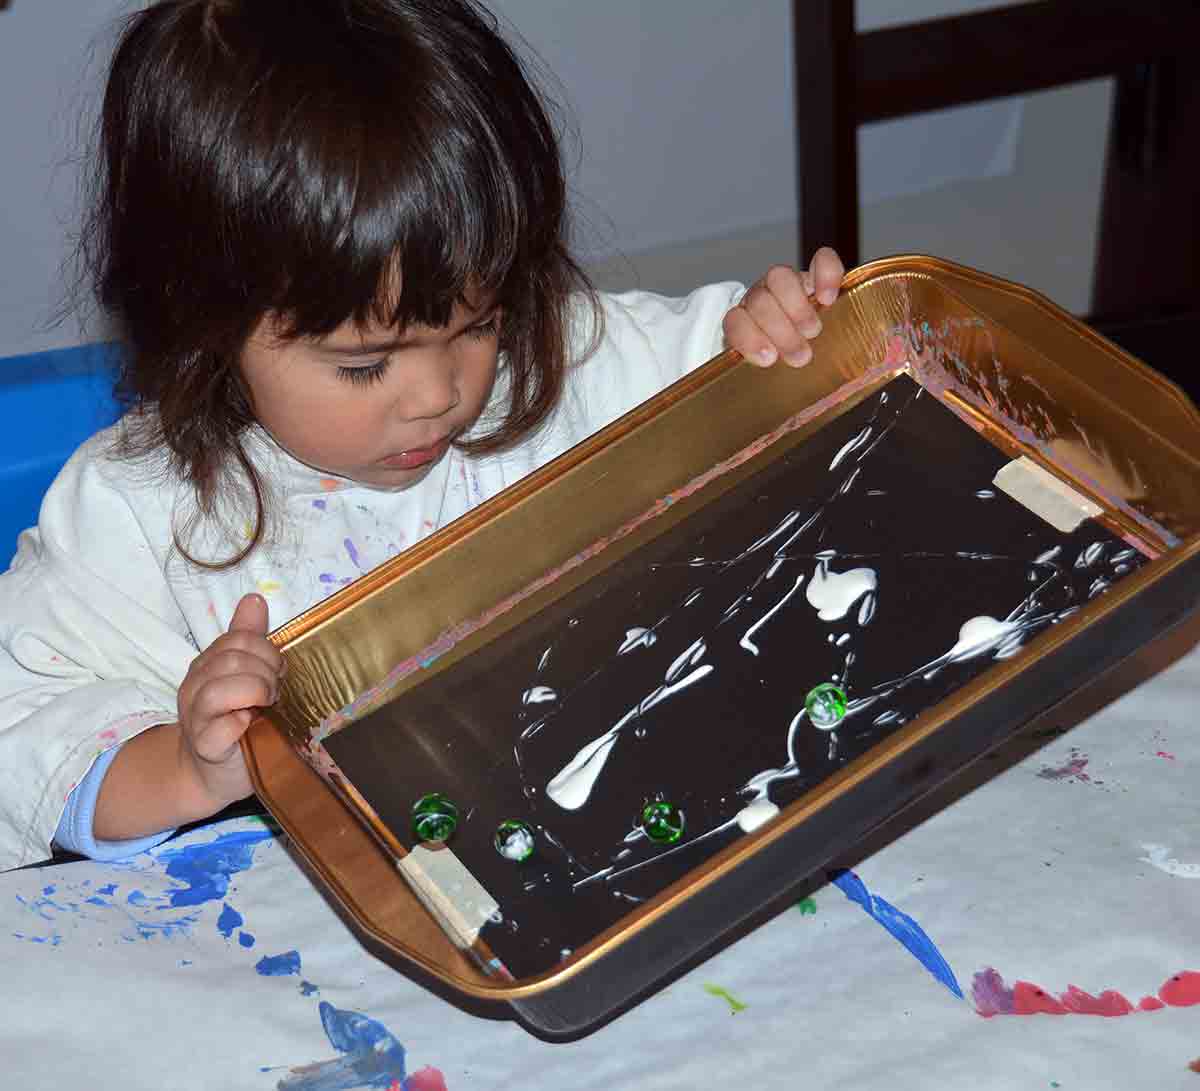
- To make the sky—cut a piece of black poster paper and tape it to a 9×13″ pan
- Squeeze a few drops of white tempera paint on the black paper
- Put 3 marbles into the pan and roll the marbles around the paint to create a Jackson Pollack-like sky
- On the blue poster paper—squeeze a few drops of white paint on the paper and have your child scrape the paint across the paper using a credit card or a piece of cardboard
- Let dry
Directions for Snowflakes
- Using various colors of cardstock paper—cut out 10-12 different sizes and shapes of snowflakes
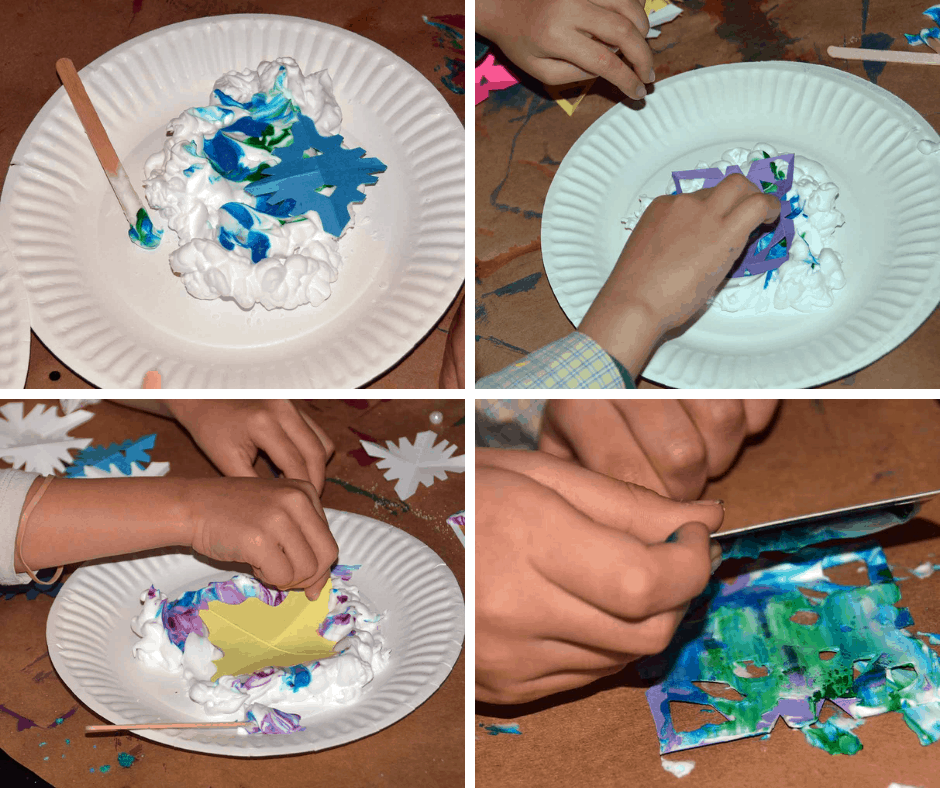
- Squirt some shaving cream on a paper plate
- Squirt a few drops of 3 different colors of food coloring on the shaving cream—we used blue, red, and purple
- Lightly swirl with a popsicle stick. Don’t overmix or you will create a muddy mess
- Press the snowflake into the shaving cream mixture
- Lift up and scrape off excess shaving cream with the credit card
- Glue the snowflake on the night sky.
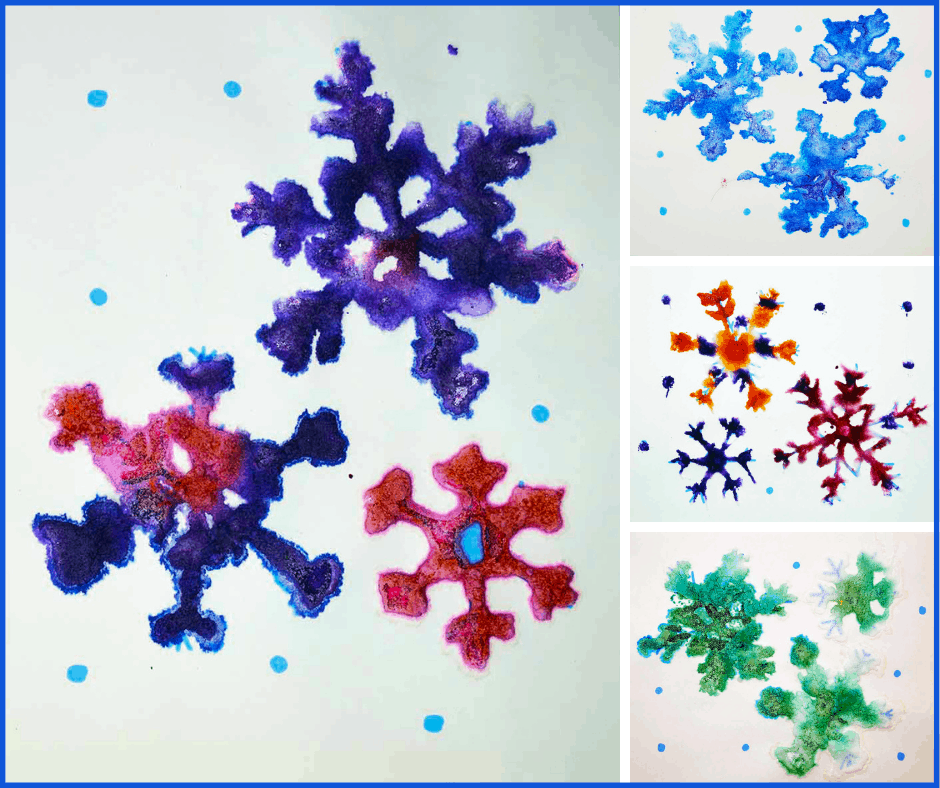
#7: Snowflake Activities: Making a Snowflake Salt Painting
This is an interesting activity that I saw on Best Ideas for Kids. You can go to their site and download the snowflake template.
Supplies:
- Snowflake template
- Glue
- Salt
- Watercolor paints
Directions:
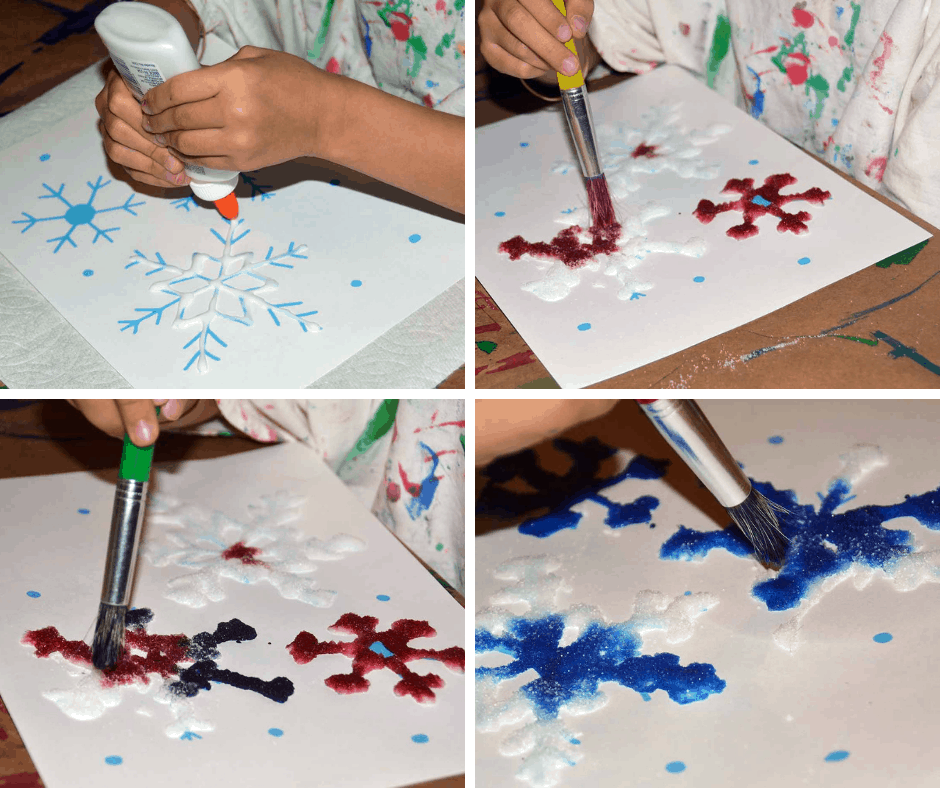
- Using a bottle of glue as your “pencil” draw around the snowflakes
- Shake a generous amount of salt over the glue
- Shake off excess salt
- Using a paintbrush, dip in watercolor paint and press onto the salt. It will spread through the salt and create a beautiful snowflake
Last, create wall space to display all your grandkids’ snowflake creations. Or take pictures each time they come and every season create a photo book of memories for each grandchild.
Grandparenting is the best gift ever–don’t miss spending one moment with your grandkids!
Here are more fun posts about activities for grandkids and grandparents:
Warning: The Most Fun Snow Activities for Grandkids
Amazing Reasons Why Grandparents are Important to Teens
Grandparenting Roles: What You Need to Be an Influential Grandparent
Want to remember this post? Post, “The Most Fun Snowflake Activities for Grandkids & Kids” to your favorite Pinterest board.







I have to start by saying Grandpa sure knows a thing or two about decorating cookies. I’m highly impressed with the way they turned out! Another amazing collection of fun activities to do with your kids and grandkids. I love all of them but the shaving cream and marble activity is so simple and makes such a beautiful final product that I can’t help but say it’s my favorite from this round-up. You’re definitely helping raise some smart cookies over there in Utah!
Thanks, Tiffany! Yes, the cookies look amazing but the best part is–when the grandkids made a mistake, we just wiped it off and started over again. Mark had to help guide their hands, but they’re getting better. I do love the shaving cream activity, but it’s very messy and everyone gets their fingers dyed from the food coloring. But, I agree–the result looked great. Thanks for your comments & support!